Table of contents
- Table of contents
- Introduction
- Pre-requisites
- Identify the broken pin
- Identify a replacement pin
- Bodge the broken pin
- Change your firmware
Introduction
Sometimes your keyboard build fails. This can be a row or column not responding, or the serial connection between both sides not working. This can happen either during the build, or after using the keyboard for some time.
In this situation, you can fix your keyboard by bodging the malfunctioning pin and then remapping the pin in firmware.
This is a complicated procedure, which requires both hardware and firmware modification. We recommend creating a help thread on the discord server at the same time.
Pre-requisites
To do this, you will need:
- a working Bastard Keyboards QMK environment. You can find instructions on how to set it up on the how to compile your firmware page
- to be familiar with compiling and flashing your own firmware, make sure to read the previous instructions
- a bodge wire - we recommend solid core, around 28AWG
It’s also possible to remap the pin through Github Actions without a local installation, but it’s more complicated. We will only explain the simpler “local installation” method on this page.
Identify the broken pin
The first step is to identify the broken pin. You can check the tables on the splinktegrated pins page to help.
Take a note of the pin number (eg. GP20).
Identify a replacement pin
Next, you need to choose a pin that’s not used, which we will use to replace the broken pin.
For example:
- if you have a Charybdis Nano, you can use one of the unused Row or Column pin
- if you have a keyboard without RGB, you can use the RGB pin
- if you have a keyboard without trackball, you can use one of the
TRCKpins. **Do not use theVCCorGNDpins.
If you have a full size Charydis with RGB, unfortunately you will need to sacrifice RGB. We are aware of this physical limitation and working on a new version of the Splinktegrated that addresses this.
Bodge the broken pin
Use a wire to bodge the broken pin and the replacement pin. You can find instructions on the how to bodge wire page.
If you are fixing a broken serial pin, you will need to do this and change the firmware on both sides of your keyboard, even the side that still works.
If you are fixing a broken row or column pin, you will need to do this and change the firmware on the side that does not work only.
Broken row or column
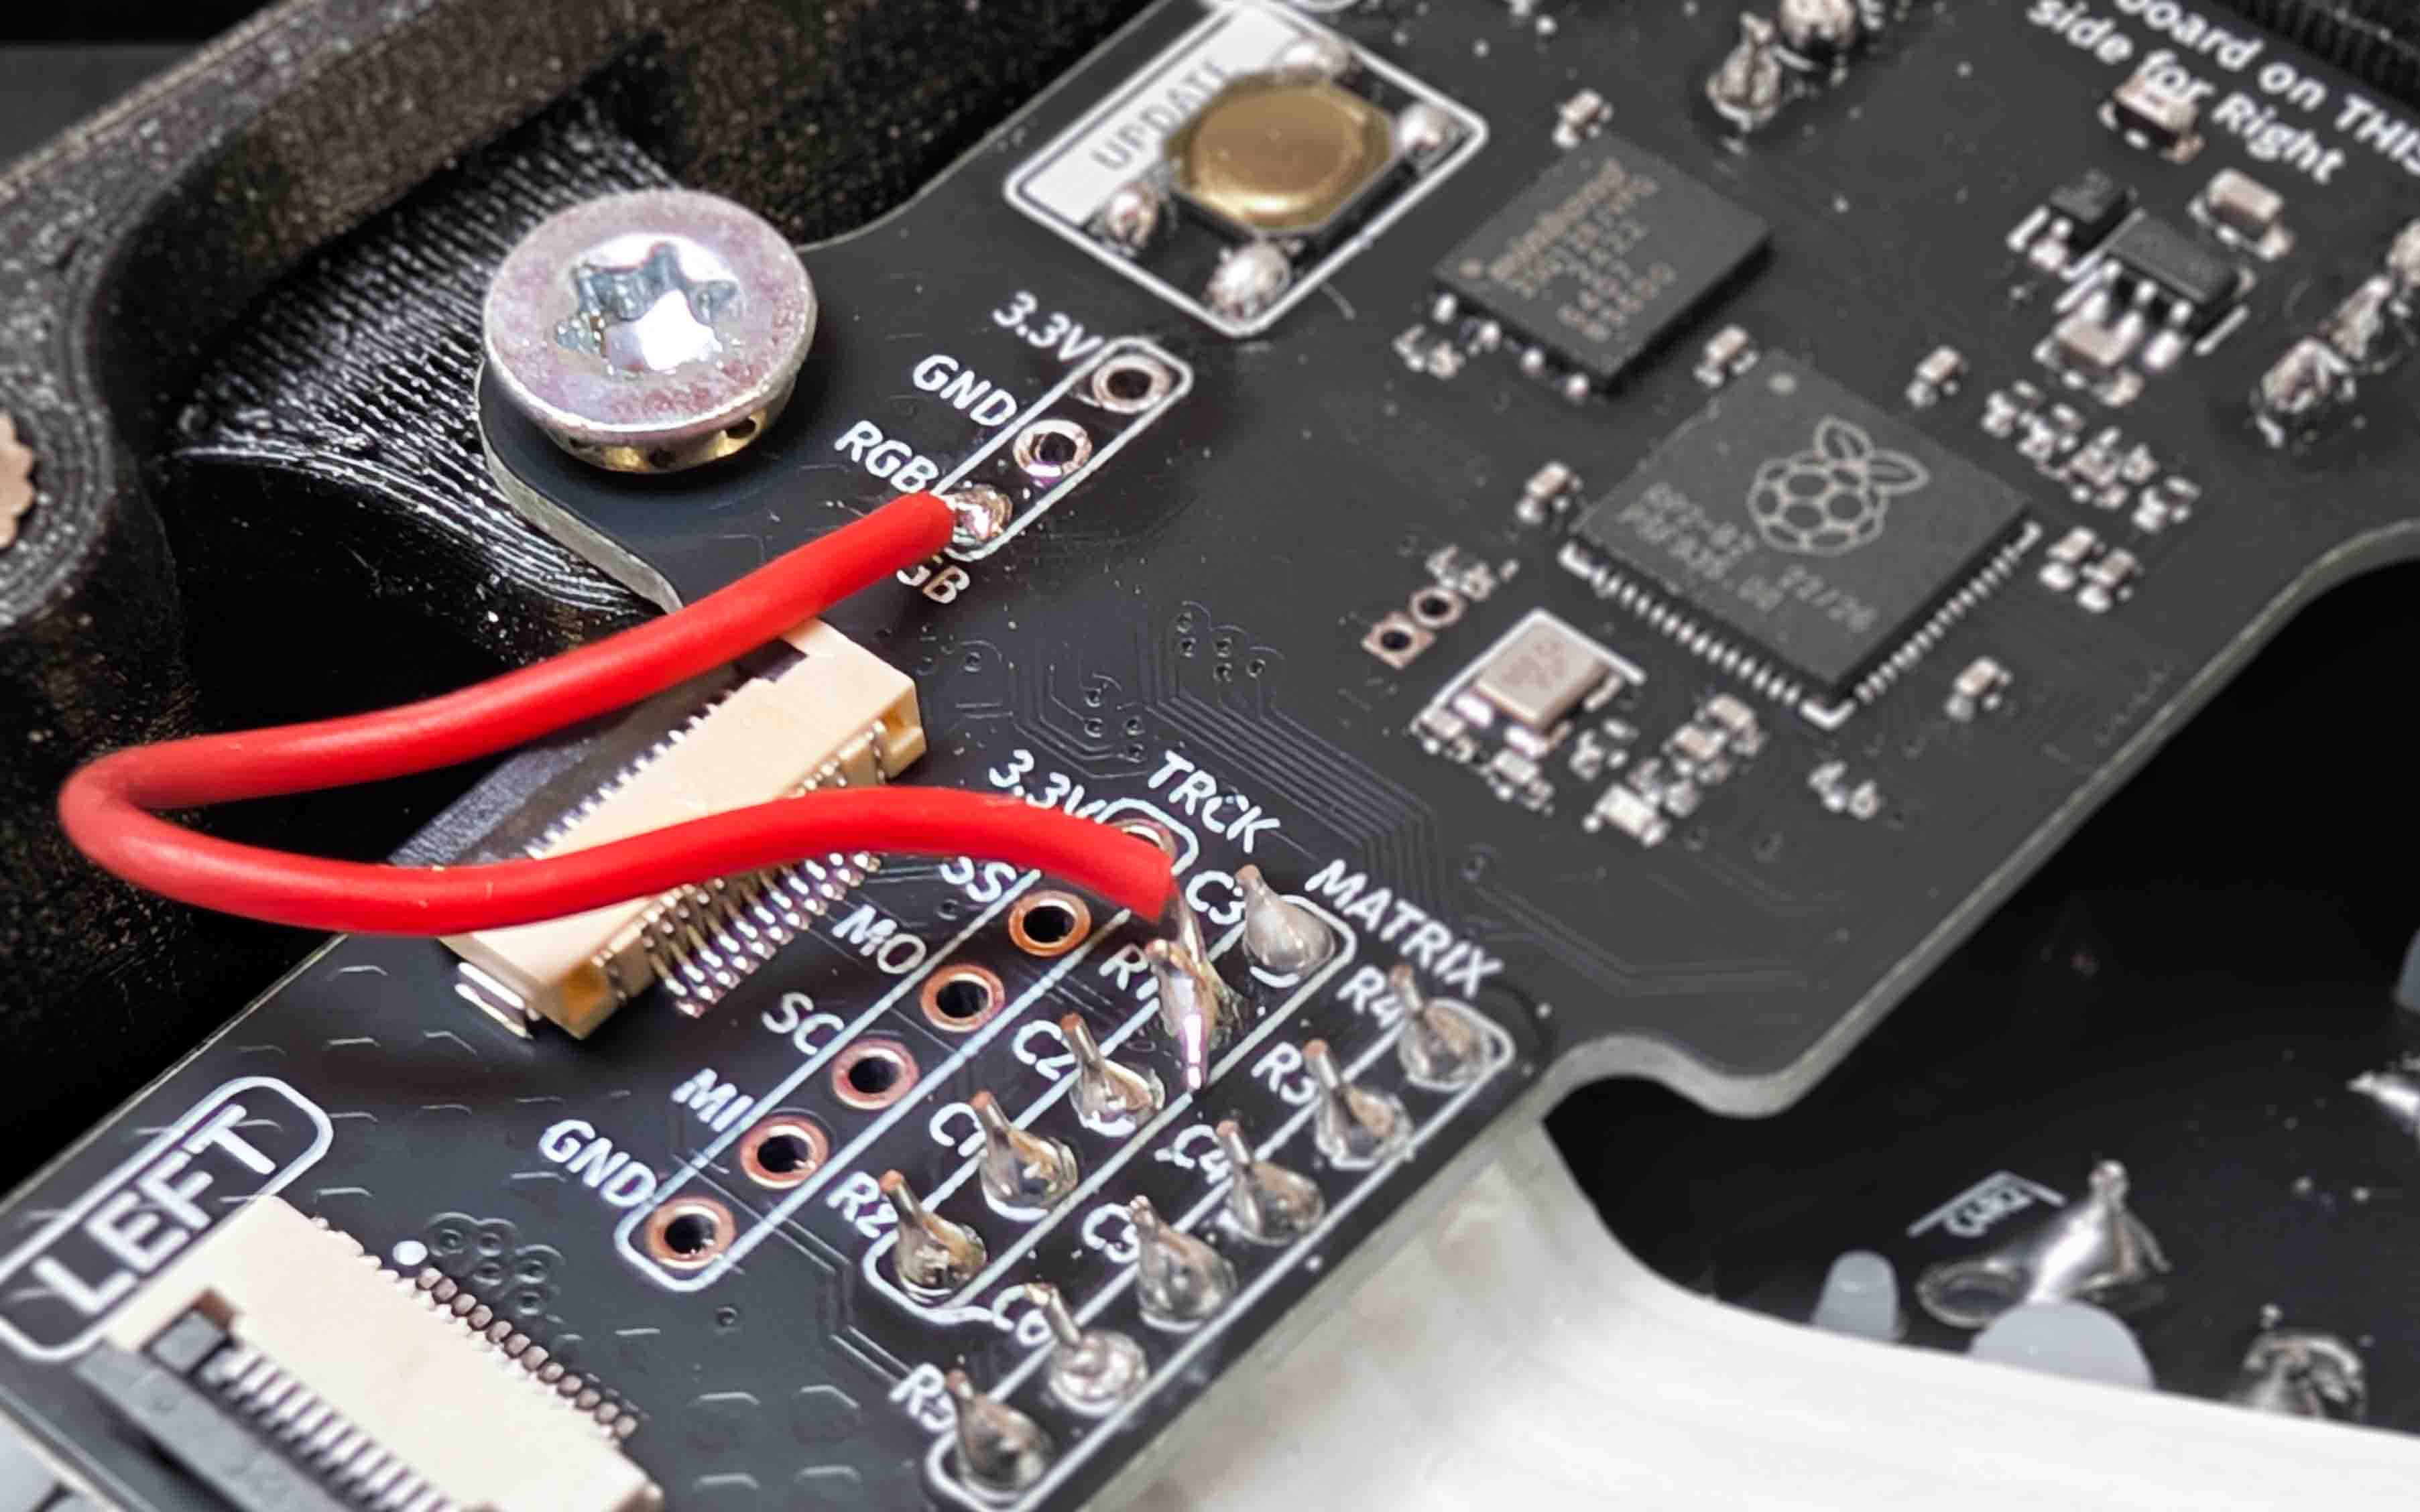
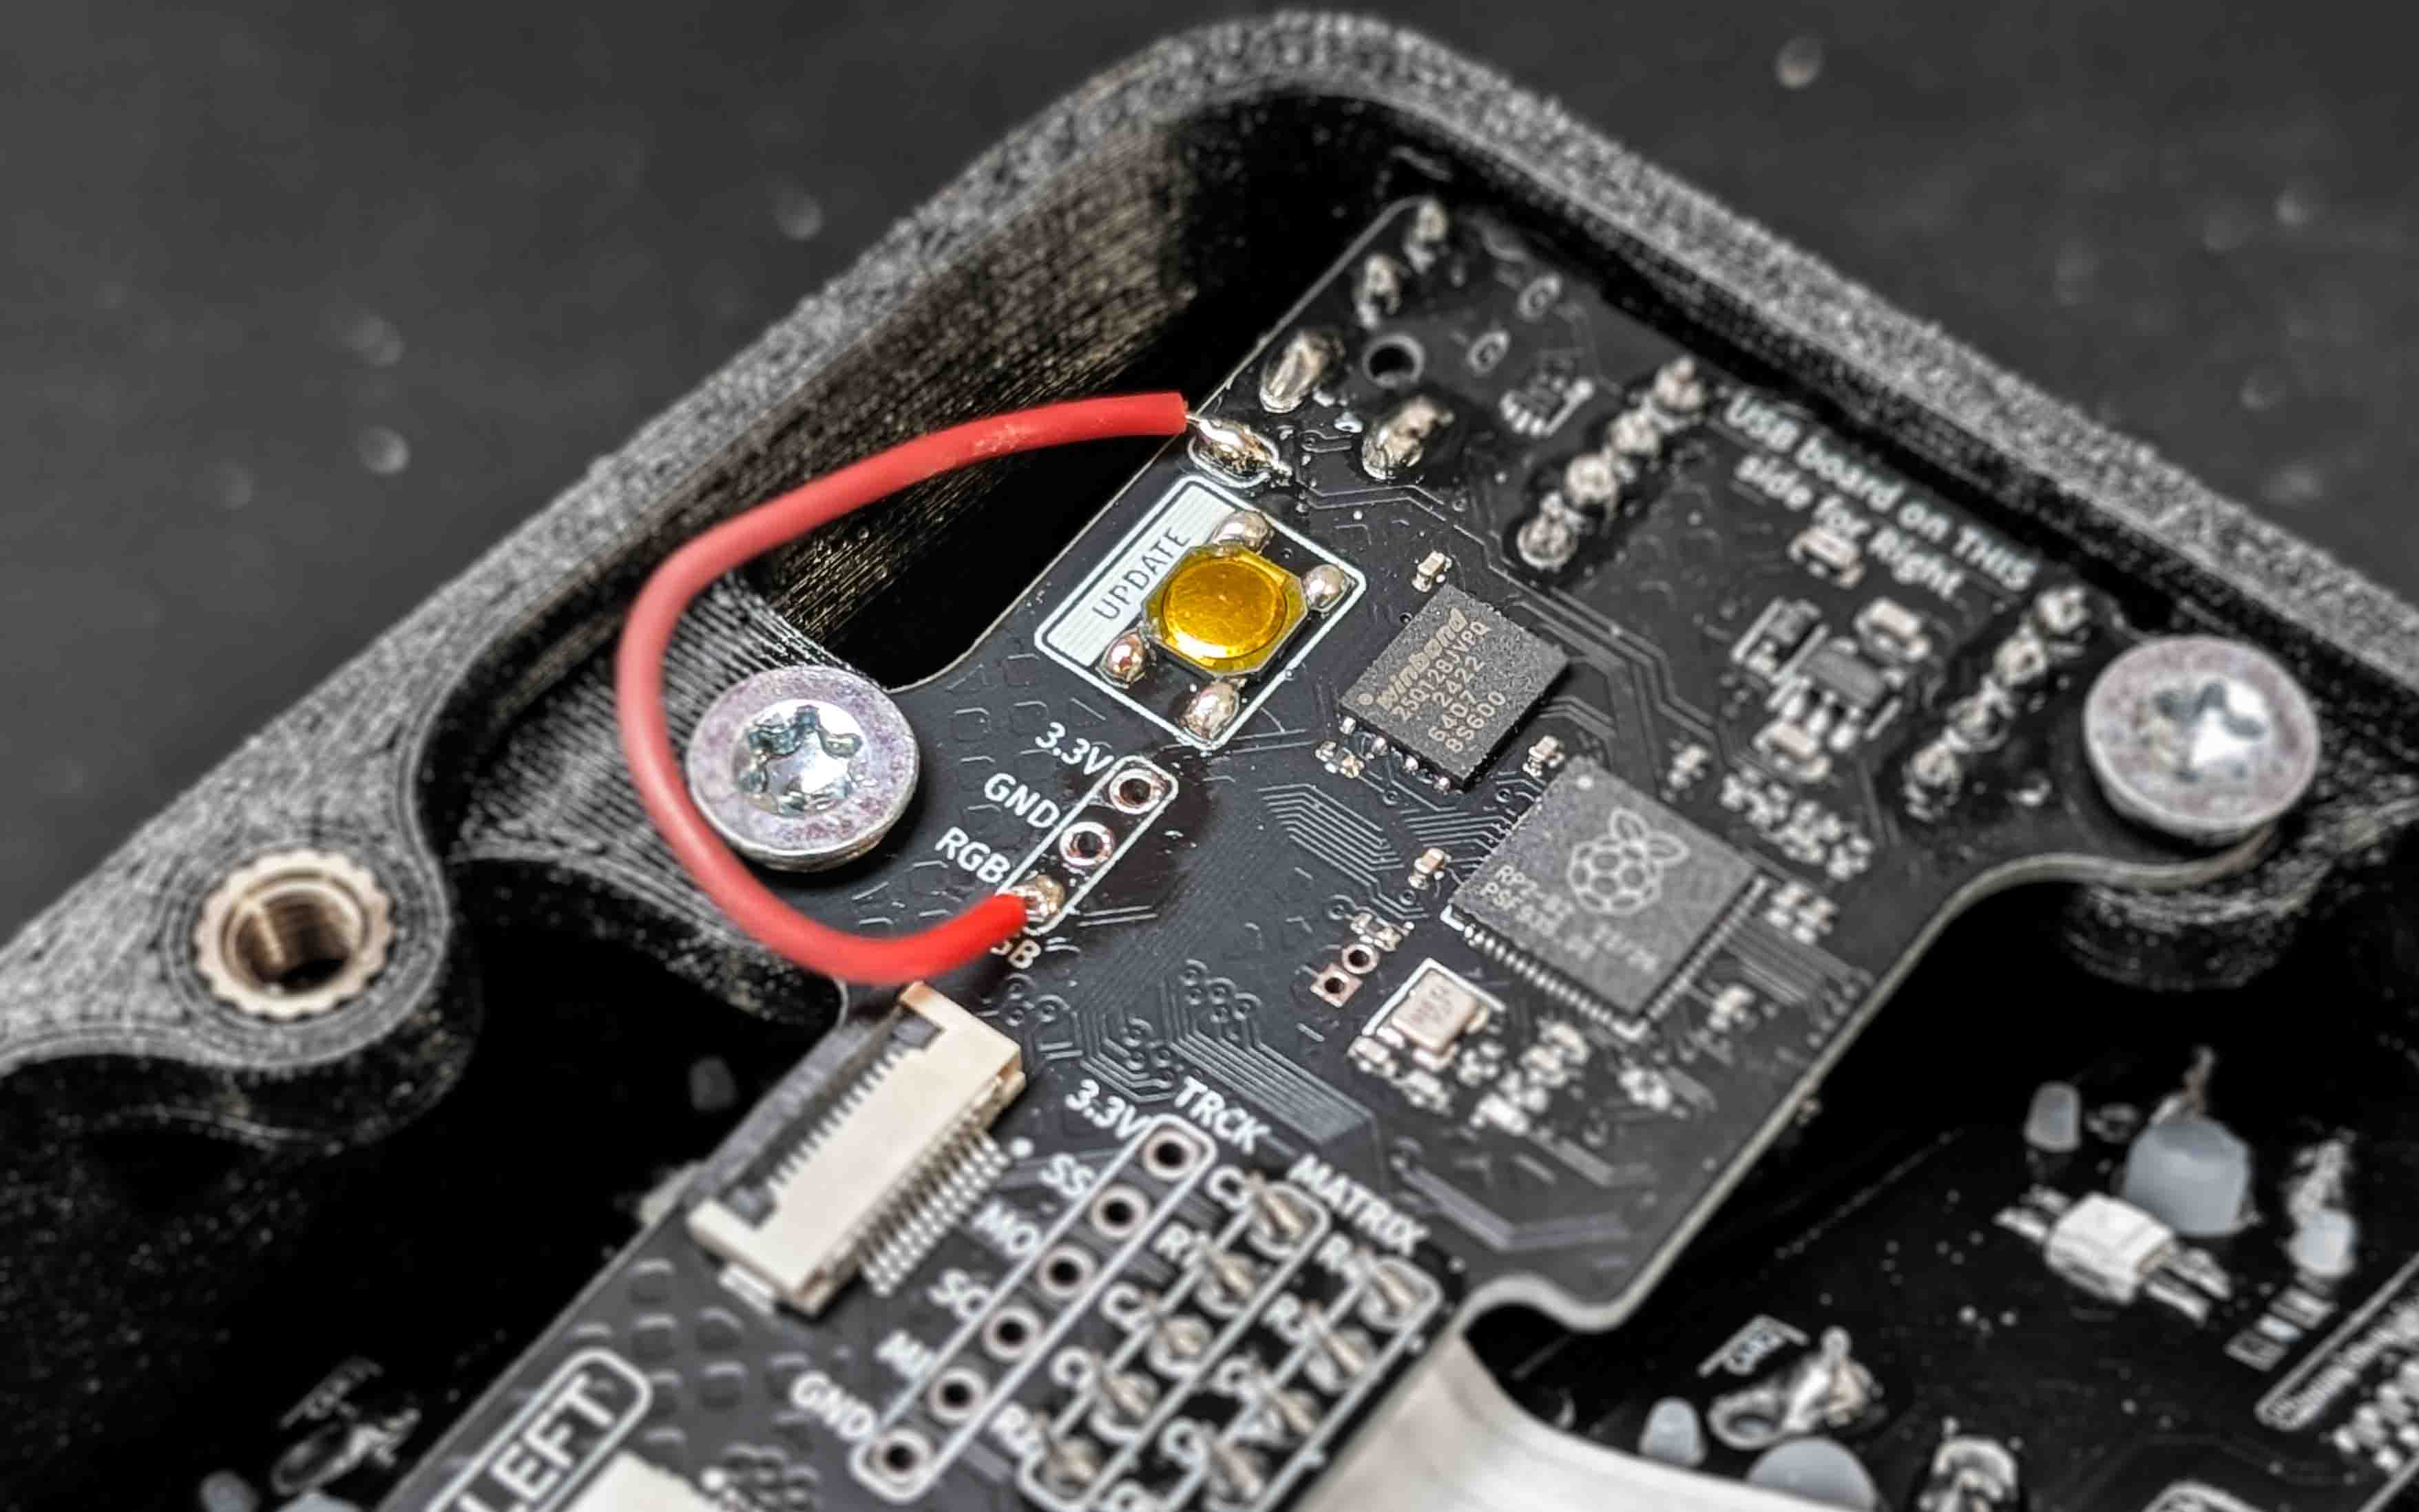
Bodging a broken row or column is easy, as you can use the MATRIX connector.
For example, bodge the R1 pin to the RGB pin if you’re not using RGB.
Broken serial pin
To bodge a broken serial pin, you can use the jumper that’s next to the audio jack. Make sure to use the one that you soldered already when building the keyboard.
For example, you may bodge the jumper pin to the RGB pin if you’re not using RGB.
Change your firmware
The final step is to change and compile your firmware.
For this, in your local QMK installation look for your keyboard’s folder.
Then, change the appropriate pin in your files.
Broken row or column
For example, if on your Charybdis right side you bodged the R1 pin (GP29) to the RGB pin (GP0), change those parts of the file bastardkb/charybdis/4x6/keyboard.json:
    "split": {
        "matrix_pins": {
            "right": {
                "cols": ["GP27", "GP28", "GP21", "GP6", "GP7", "GP8"],
                "rows": ["GP0", "GP26", "GP5", "GP4", "GP9"]
            }
        }
    },
    "ws2812": {
        "pin": "GP29"
    }
Here we modified the right side’s pin assignment only, because we bodged the wire on the right side.
Broken serial pin
For example, if on your Charybdis you bodged the serial pin (GP1) to the RGB pin (GP0), change those parts of the file bastardkb/charybdis/4x6/keyboard.json:
{

    "split": {
                "soft_serial_pin": "GP0"
    },
    "ws2812": {
        "pin": "GP1"
    }
}
Remember! In this case, since you modified the serial pin you will need to flash both sides.
Compile and flash
Then, you will need to compile and flash both sides of your keyboard.
You can now plug your keyboard in and test your work. With any luck, the fault will be fixed!
No luck yet? Ask the community on discord!