Table of contents
Introduction
Wireless bluetooth capabilities are not supported officially on Bastard Keyboards. Follow at your own risk, Bastard Keyboards, erenatas and 280Zo are not liable for anything that does not work. As it’s not an official supported build you will get limited help on the BK discord server.
If you still wish to build one of the Charybdis or Dactyl keyboards, in this page is detailed a basic outline of the work needed.
Before beginning, make sure you have some good understanding of electronics and firmware. Read the whole page before committing.
There is a video overview here made by EIGA: youtube link.
This guide is based on the erenatas build guide and the 280Zo build guide.
The purpose of it is to outline how to build a Wireless (Bluetooth) Charybdis. It is focused on how to build a 3x6 Charybdis Mini specifically.
Important notes:
- As of writing this setup does not support RGB LEDs
Caveats
There are a number of caveats involved.
Firmware:
- ZMK does not officially support input devices, so you will need to build from a fork
- There are some examples of Miryoku configurations for the Skeletyl and Charybdis Nano
- Out of the box, there might be connectivity or trackball connection issues, depending on your OS and hardware
Hardware:
- You will need custom PCBs (sensor, shield). Read more below
- At the moment, only the n!n and clones are supported. The XIAO BLE is not supported because it doesn’t have enough pins, and there is no shield PCB for it
- There is no existing solution to secure the battery inside the case
Support:
- When building one of the officially supported Bastard Keyboards, you can get online support through email or discord
- When building this unsupported bluetooth keyboard, you will only get very limited support
Required Parts
Flexible PCBs
The exact PCBs you need will depend on which keyboard you are building, refer to the official list for that.
Make sure to follow the recommendations for PCB thickness.
PMW3610 Breakout
For this PCB you will need to order it pre-assembled, and solder the PMW3610 sensor manually. The bill of materials and position files are in the repository.
For the assembly, JLCPCB did not have TCR2EF19 - but the part TLV70018DDCR is confirmed to work:
#(Old) TCR2EF19:
73dB@(1kHz) 200mA Fixed 1.9V Positive 5.5V SOT-23-5 Linear Voltage Regulators (LDO) ROHS


#(New) TLV70018DDCR:
68dB@(1kHz) 200mA Fixed 1.8V Positive 5.5V SOT-23-5 Linear Voltage Regulators (LDO) ROHS
An alternative is the BastardKB PMW3610 sensor PCB fork.
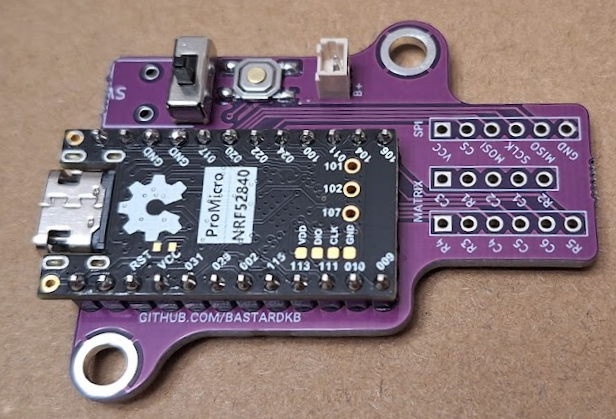
Nice!Nano Holder
This PCB Design supports having a power switch that makes use of audio jack hole.
3D Prints
Depending on which model of Charybdis you are printing, refer to the list of required 3d parts on the original repo.
For reverting the 3d files, you can do that directly in your slicer - or if you’re using a print service, use Prusaslicer or Window’s built-in 3d viewer app.
Electronic components
In this section, we will go through each component that was used, and also give example links. Those are based on the original build from erenatas.
This list is based on the electronics BOM present on the Charybdis repo as of writing, so double-check there that you’re not missing anything.
| Name | Count | Link |
|---|---|---|
| Trackball | 1 | Perixx Europe |
| nice!nano microcontroller* | 2 | Splitkb.com |
| (optional) mill max sockets | 2 | Splitkb.com |
| SOD123 Diodes | 41 | Splitkb.com |
| Button, 4x4x1.5 | 2 | Aliexpress |
| PMW3610 module | 1 | Aliexpress |
| Mini Toggle Switch TS-6 SPDT | 2 | Aliexpress |
| Batteries | 2 | Aliexpress |
| Ceramic Bearing Balls 2.5mm | 3 | Aliexpress |
| Flexstrip Jumper Cables* | 2 | Aliexpress |
| Key Switches | 41 | Aliexpress |
| M3 5mm Brass Melt Nuts | Aliexpress | |
| M4 5mm Brass Melt Nuts | Aliexpress | |
| M3 8mm Torx Screws | Aliexpress | |
| M4 8mm Torx Screws | Aliexpress | |
| JST plug 2-pin | 2 | Aliexpress |
*Alternatively, you can use one of the alternatives documented on this MCU wiki, like the SuperMini NRF52840 Microcontrollers.
Notes
Flexstrip Jumper Cables (Ribbon cables):
You will need:
- 72mm or more for the nice!nano holder
- 80mm or more for the thumb plate
- 100mm or more for the sensor PCB
If the cables snap or are hard to desolder, you can use 28AWG single-core wire instead.
Batteries:
One important part here is the battery. If you order a battery from Aliexpress to Europe, the order will be shipped with freight, meaning it will take ~2 months to arrive.
Due to this reason, if you reside within EU, you should try to source a battery of your choice within EU.
What needs to be considered before ordering any battery is to ensure that it is:
- 3.7V
- more than 80mAh
- if you want to squeeze the battery between nice!nano and and the holder PCB, then you need to be careful of its size. At 42keebs.eu, it states that you can fit
350926,301230,401030underneath the nice!nano microcontroller - again, if you would like to fit a battery underneath nice!nano, you may want to buy Mill Max Low Profile Sockets with Headers in order to create the gap in between. Then you’ll need to use a case with a raised USB-C hole (only available for certain keyboards)
For this build specifically, a JST plug was used to be able to take out the batteries without the need of desoldering.
Assembly
Most of the steps are similar to building a Charybdis Nano. Below is an outline, with details on what needs to be done differently.
Solder the PMW3610 to the sensor board
There is a single orientation to solder it. You can take out the sensor cap while doing any soldering to prevent touching it with the soldering iron. Also make sure to remove the kapton tape.
Solder the nice!nano holder components
Solder on the power switches, and reset buttons to the left and right nano holder PCBs. Then solder on the JST female connectors. Position this so the red wire on the male side would be the battery’s positive connection, and the black wire the negative connection.
Solder the MCUs to the nano holders using the standard pin headers or the socketed pin headers, depending on what you chose to order to mount the MCU.
The MCUs should be face down (components facing towards the nano holder PCB), and the top through holes on either side of the USB connector will not have a spot on the nice!nano PCB.
Do not set your soldering iron any higher than 300°C, as it might damage the nice!nano.
You can use this video from Joe Scotto to help.
Being careful to not short any connections, connect the JST battery connections, turn the switch to the on position, and confirm the MCU powers on.
If all goes well, unplug the battery and continue the assembly.
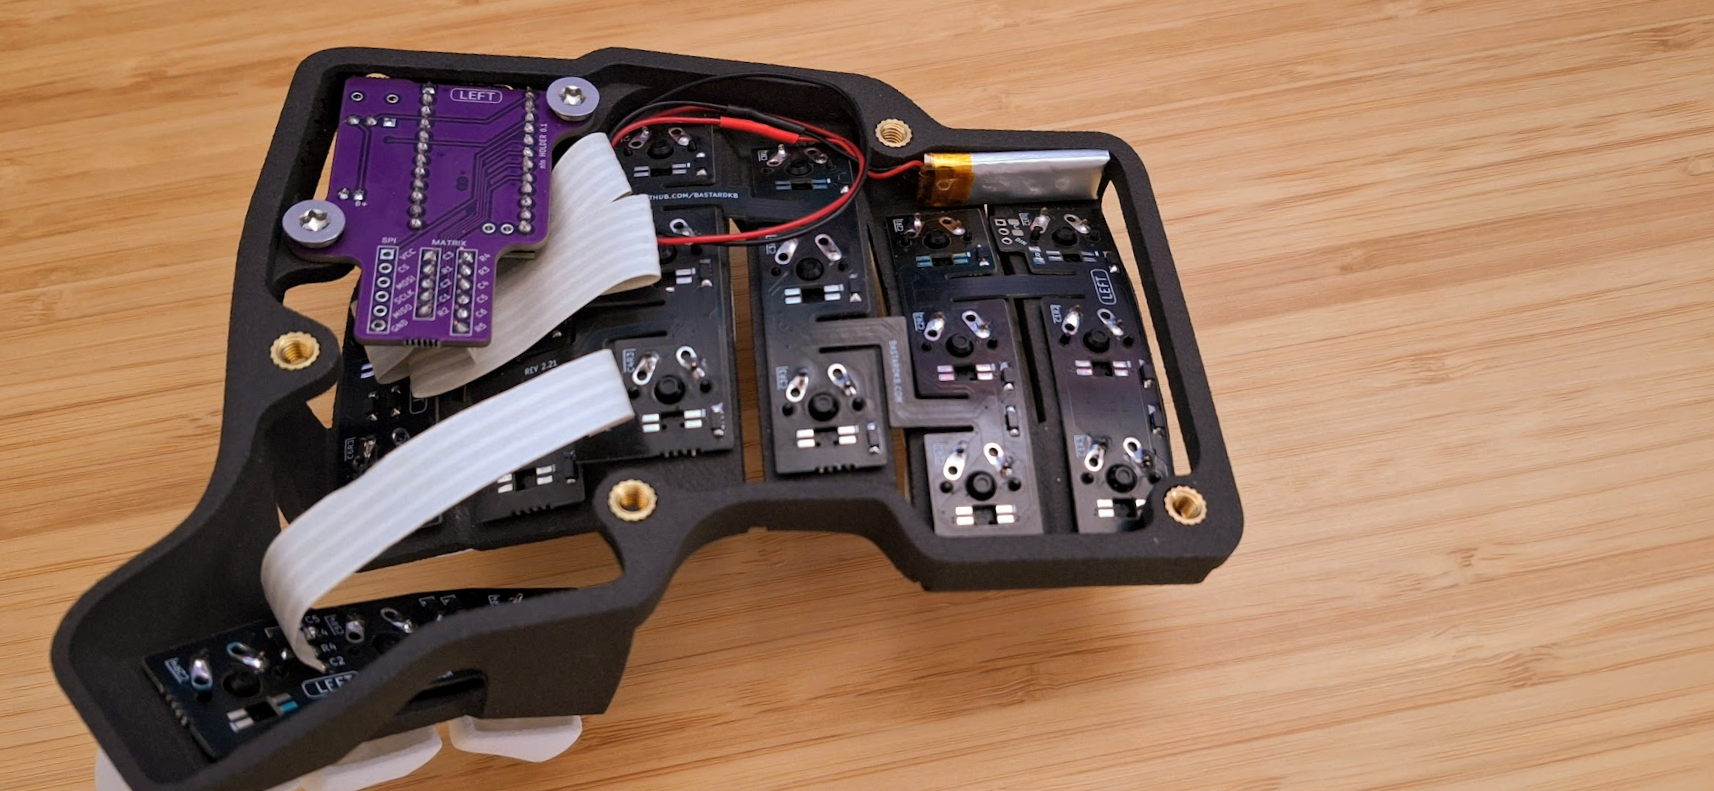
Install the battery into the case
You can either mount the battery between the MCU and holder PCB, or tape it to the case.
Firmware
The firmware can be downloaded from the charybdis-wireless-mini-zmk-firmware repository by logging into GitHub, opening the Actions Workflows, selecting latest successful run on the main branch, then downloading the firmware that best fits your use case. The repo has firmware for bluetooth and dongle configurations, both in QWERTY and Colemak dh layouts. If you’re unsure which one to use, you probably want the firmware-charybdis-qwerty build.
- firmware-charybdis-qwerty - Bluetooth/USB with QWERTY layout
- firmware-charybdis-qwerty-dongle - Dongle with QWERTY layout
- firmware-charybdis-colemak - Bluetooth/USB with Colemak DH layout
- firmware-charybdis-colemak-dongle - Dongle with Colemak DH layout
- firmware-reset-nanov2 - Reset the firmware completely
To add support for the PMW3610 sensor, badjeff’s zmk-pmw3610-driver, ZMK Input Behavior Listener, and ZMK Split Peripheral Input Relay modules are included in the firmware. A separate branch builds the Bluetooth firmware using inorichi’s driver as an alternative to badjeff’s driver.
Pete Johanson’s pointers-with-input-processors feature is also included to allow mouse keys to move and scroll.
The firmware supports ZMK Studio, and the base layer makes use of home row mods to make typing as efficient and comfortable as possible. If you’d like to see the key layout, a layer map is automatically generated by the pipeline and added to the repo’s README. Here you can also find information on how to customize the key bindings and layers, and tips on how to modify the firmware build configuration yourself.
Additional links:
- erenata’s ZMK config: https://github.com/erenatas/zmk-config-charybdis-mini-wireless
- EIGA’s config: [EIGA’s config repo](https://github.com/erenatas/zmk-config)
Erenata added scroll support via forking @grassfedreeve’s config and adapted it to 3x6 mini.
Flashing the firmware
To flash each side of the keyboard, follow the steps below:
- Unzip the firmware.zip file you downloaded
- Plug the right half info the computer through USB
- Double press the reset button you soldered onto the nano holder PCB
- The keyboard will mount as a removable storage device
- Copy the charybdis_right-nice_nano_v2-zmk.uf2 file into the NICENANO storage device.
- It will take a few seconds, then it will unmount and restart itself.
- Do the same with the left half, and copy the charybdis_left-nice_nano_v2-zmk.uf2 file.
- Both halves of the keyboard should now be flashed with the firmware.
Examples
- https://github.com/ykz89/zmk-config
- https://github.com/0xcharly/zmk-config
- https://github.com/bstiq/zmk-config
- https://github.com/grassfedreeve/Charybdis-ZMK-Config
Credit
This page is based on erenata’s work and 280Zo’s work.
You can find the original repos here: