Table of contents
- Table of contents
- Introduction
- Overview
- Sourcing your firmware
- Bootloader
- The USB drive
- The other hand
Introduction
There are 2 ways of customizing your Bastard Keyboard:
- using VIA through a web interface
- flashing your own firmware
Flashing refers to writing a new firmware binary onto a controller. This article will describe the process and the various ways of initiating it.
This article applies only to RP2040-based controller in general and the splinky, splinktegrated and the integrated Dilemma controllers in particular.
A note about the TRS/TRRS cable: It does not disturb the flashing process and can remain in place. We advise you not to unplug the cable when flashing to reduce the risk of accidentally hot-plugging it.
Overview
To flash your new image, you will need to go through a few steps:
- source your own firmware
- put the keyboard into bootloader mode
- copy the image to the USB drive
- (if needed) flash the other hand
Below is detailed the exact procedure to follow. You need to flash either the right side only, or the right and left side separately - this is also detailed below.
Sourcing your firmware
Sourcing your firmware can be done in a couple ways:
- downloading it from the release section on github
- build your own firmware, detailed here
Bootloader
The first step is to put your keyboard into bootloader mode. During this time it will not function as a keyboard, but it will be ready to receive new firmware.
- if you want to flash the right side of your keyboard, grab the right side only
- if you want to flash the left side of your keyboard, grab the left side only
There are several ways of initiating bootloader mode:
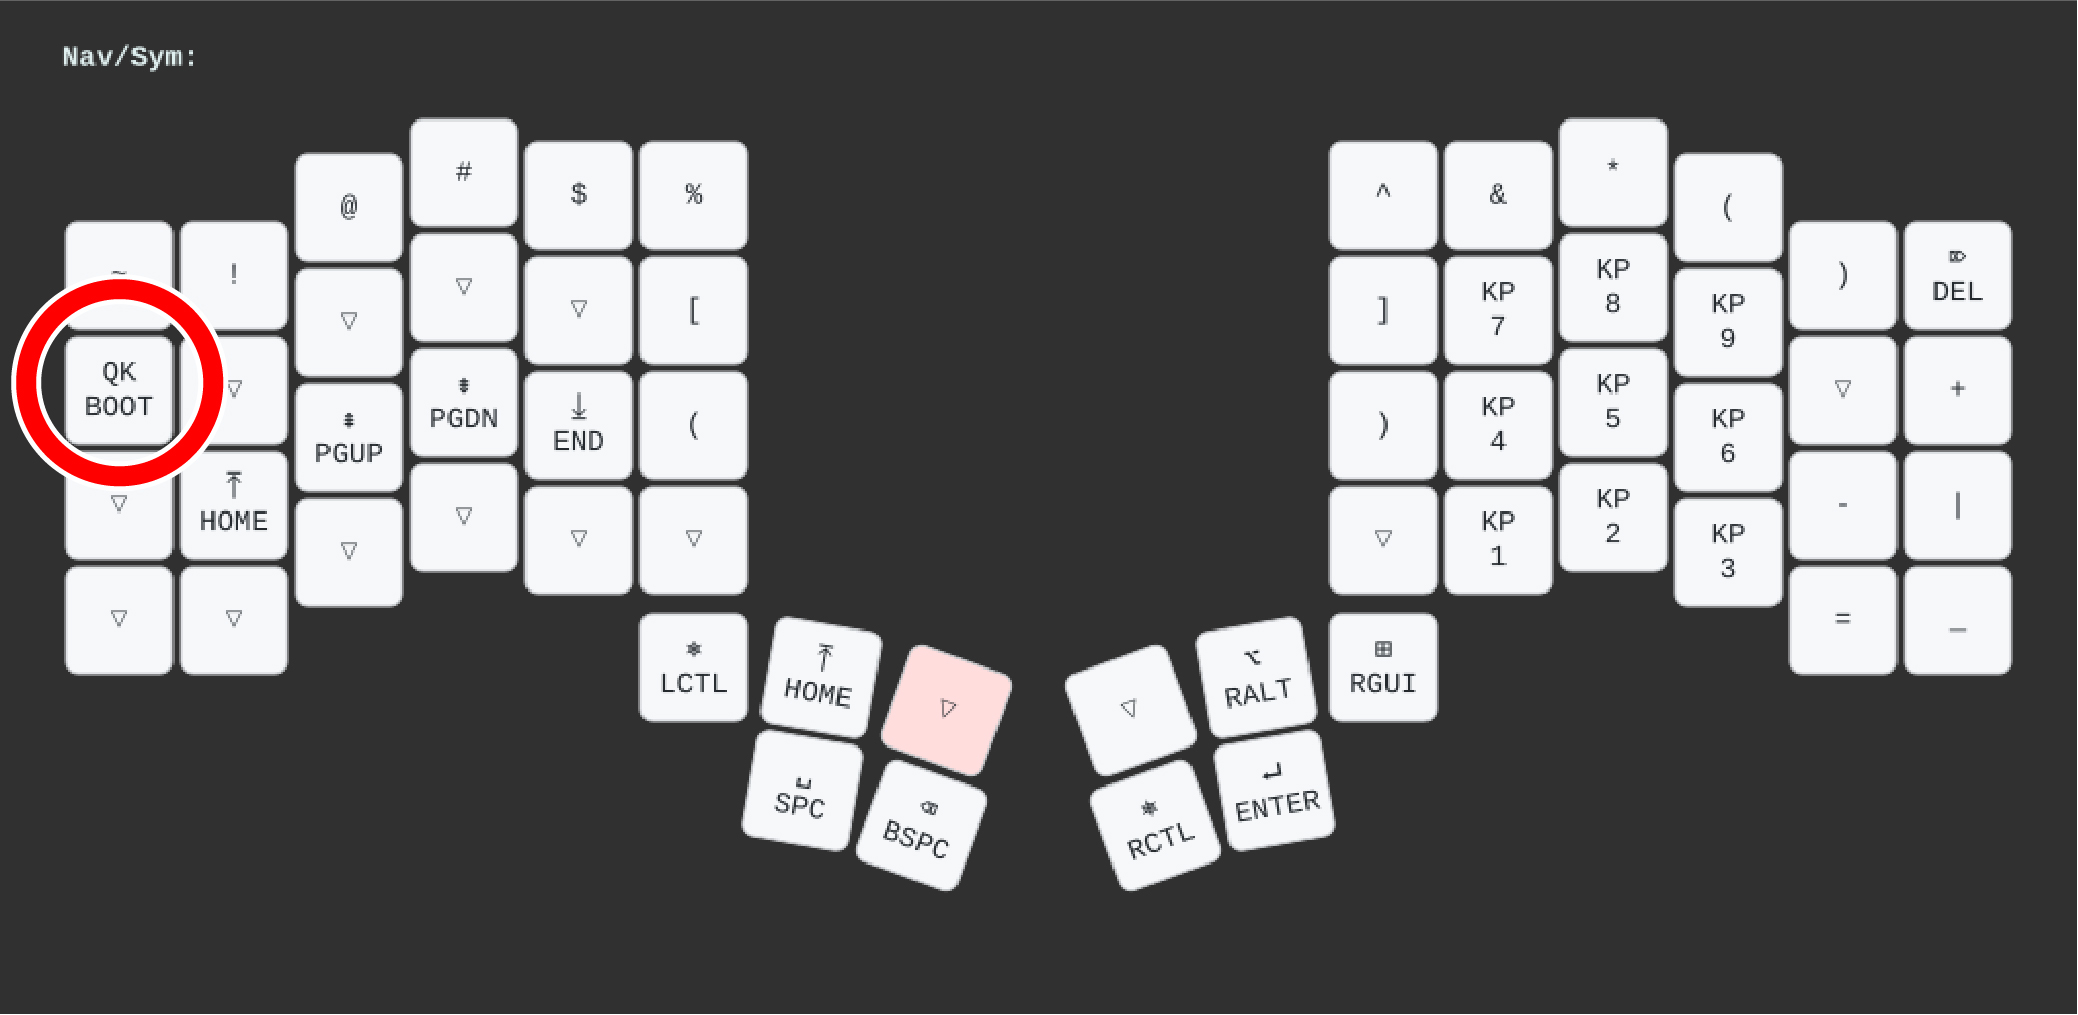
QK_BOOT keycode
There exists a dedicated key code that will immediately reboot into the bootloader. This key is present on all default keymaps.
Please refer to the keymap guide to find the default location of this key for your keyboard.
For example, on the Charybdis the keycode is on the Nav/Sym layer:
Once you’ve put the keyboard in bootloader mode, you can skip to the usb drive section.
Bootmagic
Using Bootmagic will clear the memory of the chip. This means you will lose all changes you have made in via, as well as your chosen RGB effect and color, and your chosen DPI on a board with a pointing device. If you wish to retain your settings, please use a different method.
To initiate bootmagic:
- grab the side of the keyboard you want to flash (either left or right)
- unplug the USB cable
- hold down the top right key (if you’re flashing the right side), or
- hold down the the top left key (if you’re flashing the left side)
- at the same time, plug the USB cable in again
- release the key
Once you’ve put the keyboard in bootloader mode, you can skip to the usb drive section.
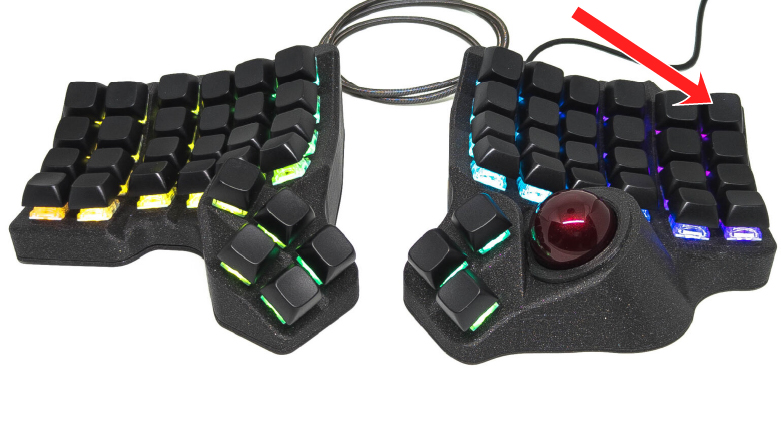
Update button
Locate the button labeled “UPDATE” or “RESET” on your controller.
The Dactyl and Charybdis families have a hole in the bottom plate allowing access to the button with for example a pen. On the Dilemma family, the button is located on the top of the keyboard.
Tapping this button twice within 500 milliseconds will engage the bootloader.
Once you’ve put the keyboard in bootloader mode, you can skip to the usb drive section.
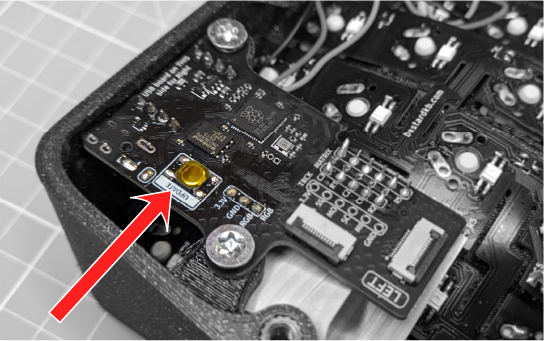
Hardware fallback
The hardware fallback is an emergency method:
- if the currently flashed firmware will not work, eg. if none is loaded, such as on a self-sourced controller
- if something went wrong while flashing
- if you accidentally flashed a firmware for a different board
For this, you will need to unscrew the case bottom and locate two through holes, either labelled “BOOT” or unlabelled.
Next, unplug the USB connector, and then bridge the two pads, for example using metallic tweezers. Hold this connection while you plug in the USB connector, and release it shortly afterward.
Once you’ve put the keyboard in bootloader mode, you can skip to the usb drive section.
The USB drive
Once you successfully initiated the bootloader, your PC will detect a new USB drive labelled RPI-RP2 containing two files, INDEX.HTM and UF2_INFO.TXT.
To proceed, write the .uf2 file that you downloaded from the release section or compiled yourself to this drive, for example by simply dragging and dropping it in your file manager or by issuing a qmk flash command.
Do not unplug the keyboard at this stage, as partially writing firmware will result in a non-functioning keyboard. Should this happen to you, see the Hardware fallback section above.
The USB drive will disappear after writing the file. On MacOS and some Linux systems you may receive an error that writing failed, which you can ignore. The keyboard will reboot into the new firmware shortly afterwards.
On a Linux system, you will need to ensure the drive is automatically mounted and user-writable for a qmk flash command to work. No specialized udev rule is required beyond mounting.
The other hand
If you have made changes to the RGB, the QMK version, the rotary encoder, or the trackball behavior, it’s a good idea to flash the other side as well. You can read more on the splitkb article on this topic. If the keyboard is behaving in a weird manner or if you have any doubt, always flash both hands.
Unplug the USB connector and connect the other side, and then repeat the procedure - flashing the same firmware file.
If you use the QK_BOOT method, please note that your layout may now be mirrored! This is normal, ignore it and plug the USB back into the right side.